UPDATE AT THE END
Well i tested out a lot of setting to get a good quality on to vimeo … and i was not really happy with results…. at one point i testes out the mp4 / h.246 settings philip bloom & others used a lot (http://www.vimeo.com/10215536)
and guess what… it’s a good solution
… so this is step by step… make sure you have a good master (look at my workflow post how to get this 😉 if your master is not good it won’t get better … 😉 and it’s essential to use QuickTime 7 Pro (on Snow Leopard you have to install it from your setup disk and it’s located in the Utilities) … ok you are good to go … one side note: you can translate this for 1080p as well … i most of the time use 720p.
So open up your master file …i always export a ProRes 1080p master in FCP and form there i can go to SD (via MPEG STREAMCLIP) or a wmv for clients or iPhone m4v for the Producers (via QT 7 & QT X)… or even YouTube (via the Compressor preset) … I NEVER have to go back in my FCP timeline to do that … or even better: while exporting all that stuff with QT 7 i can work in FCP on other things … and i don’t like the new “share” option in FCP … seems like it needs like forever to export stuff (i don’t know why … the QT7 thins works anyway)
BTW if you can’t find QuickTime7 on your Snow Leopard Mac … here is a hint for you:
QuickTime7 & Snow Leopard
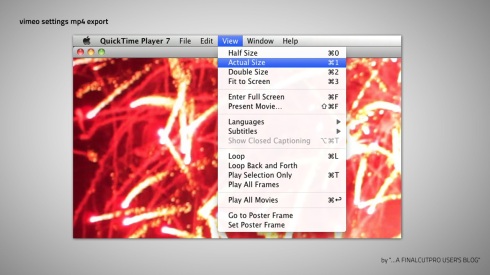
So the first step is important: go to “VIEW” and choose “Actual Size” otherwise you could end up with strange resolutions like 1888×652 or so …
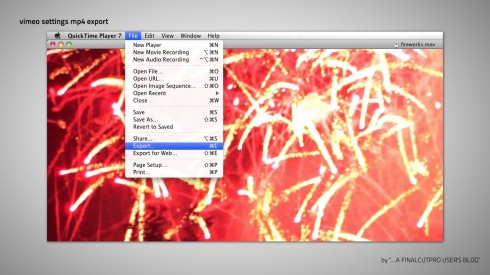
so the rest is pretty much self-explanatory … go to “EXPORT”
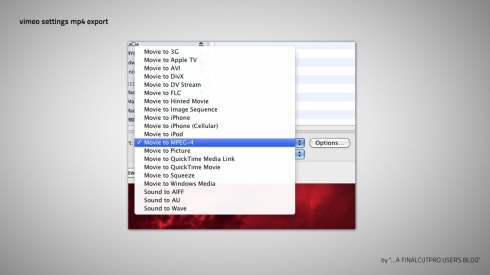
choose MPEG-4
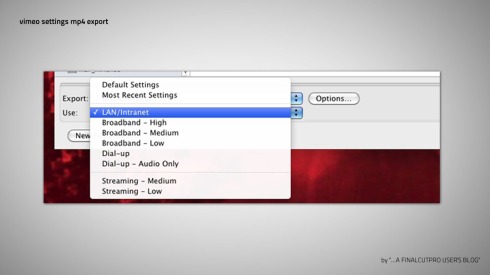
now make sure you choose “LAN/Internet” so you have all the settings/options you need in the next step
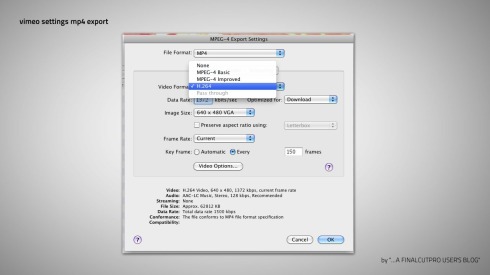
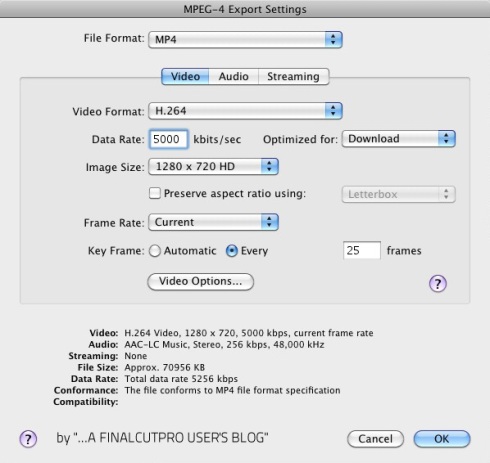
make sure you are exporting h.246 ( is usually “on” by default)
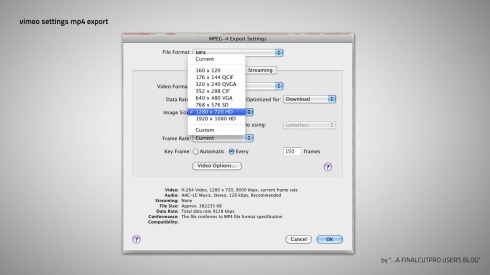
now choose your resolution…this works with 1080p or others as well
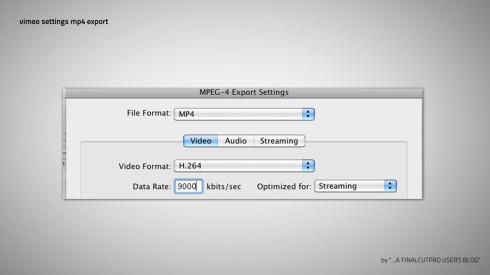
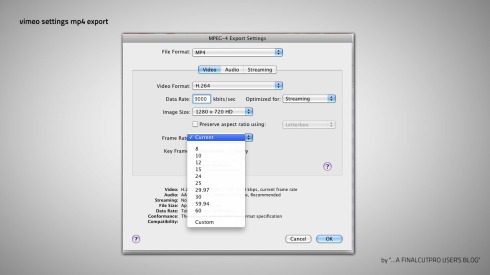
now the Data Rate … some say 9000 is too much but the truth is i used the vimeo recommendations and had trouble with “blocky” things and was not happy with transitions (usually over black) and text and stuff
i will try a recommendation by @mobiledivide (720p = 5000kbps, 1080p = 7000kbps) soon to see how this works out
he also recommended download for the “Optimized” option … for now i set it to streaming due to the fact vimeo is a streaming thing …
set the frame rate to current so QT is right whether you are at PAL or NTSC 😉
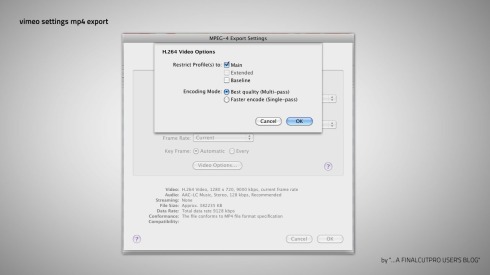
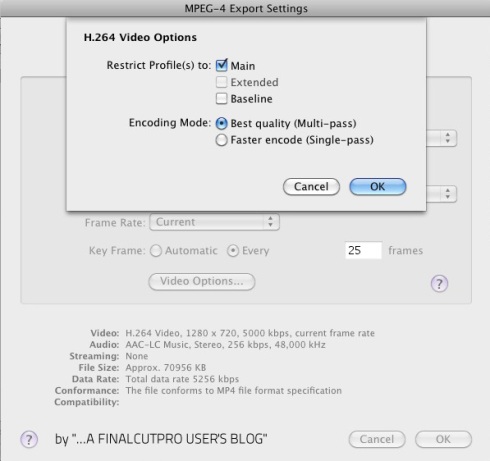
just check this “video options” it should be usually (by default) MAIB and best qual. Mulitpass
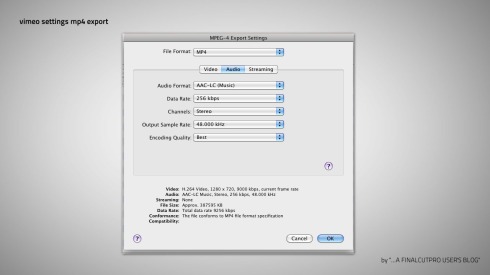
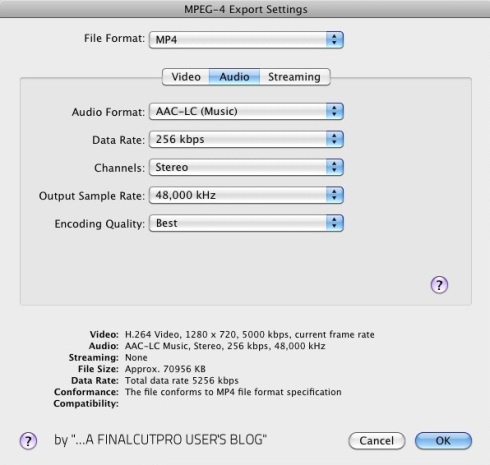
with audio use 256 kbps so you get a bit better sound-quality and 48 kHz should be your Pro Audio Sample Rate anyway ( in footage / FCP / Master)
UPDATE:
so now i did try the settings as mentioned / recommend by @mobiledivide although he i using compressor
i still would recommend QT7 for the vimeo export … anyhow:
these are the settings:
“720p = 5000kbps, 1080p = 7000kbps,turn frame controls ON and choose “Best”, “Progressive”, “Best”. Keyframe every 30 frames.
and this is what i did in the end in QT7 for my 1920×1080 25p Master (PAL) to export my 720p, 5000 kBit/s version.
5000kbps, Keyframe every 25 frames …
… so in a nutshell: the high-quality settings are: mp4, h.246, 1280×720, 9000 kbits/s, AAC 256 kbps 48kHz
and your normal-quality settings could be : mp4, h.246, 1280×720, 5000 kbits/s, AAC 256 kbps 48kHz
So if you ask me i noticed a lil resolution issue in the 5000 kBit/s Version especially on edges during / at fast motion shots … like arms and stuff (kinda “blocky”) but maybe i’m just too “pedantic” … in the end i’ll go for the 9000kBit/s solution and if i need a fast upload or have some Memory-Space “problems” i’ll choose 5000 kBit/s.



Thanks for this post Mike!!! Went through the steps as per above and waiting on the video to finish exporting. Will let you know once the video is up if quality is better. Looking forward to seeing the result!
Thanks for your post! It really helped me out. So as i understood after thousands of tutorials, the best quality with the smallest file is the result of firstly EXPORTING TO PRO RES (to the bigger file) and then COMPRESSING IT, right?? I had the best results, with a 2min piece of 150mb winning others compressions to h.264 directly from fcp with a weight of 1GB. Incredible, thanks!! I hope it will help to the other in this hellish exporting world.
you are welcome… no problem … good to know that post still helps 🙂
yes indeed always export am Master in ProRes so u get the best out of it … 😉